



Schoology Quick Start Guide
Build an online course students can navigate, use, and complete: organize the lesson, provide the materials, collect evidence, and guide the next step.
Schoology is a learning management system. Teachers assemble the instructional experience using folders, pages, files, links, assignments, discussions, and assessments. The course structure gives your selected curriculum a place to live; the learning goals, explanations, activities, and feedback still need to be designed.
Use your district’s Schoology address or approved single sign-on portal. This guide uses the teacher web experience; course provisioning, menus, integrations, and the elementary student view vary by district.
A Simple Course-Building Cycle
Plan
Decide what students will learn, do, and submit.
Build
Arrange folders, lesson pages, resources, and tasks in a usable sequence.
Teach
Release the work, monitor participation, and assess student responses.
Improve
Give feedback, support revision, and refine the unit for reuse.
Build one complete learning sequence first: A short introduction, one lesson with its sources, one submission task, and a feedback routine are enough to test the course design. Expand after students can follow that path successfully.
District Setup
Establish the course framework and local rules before building a large amount of content.
Confirm the course, roster, and grading responsibilities
- Use the district login and verify the course section, term, teacher permissions, and student membership.
- Establish who creates courses and manages enrollment. For SIS-managed sections, resolve missing courses or students through the district roster process before creating duplicates.
- Confirm which system holds official grades and whether grade passback is enabled. Identify the support contact for roster, integration, and grading problems.
- Review Grade Setup: categories, scales or rubrics, weighting, and final-grade rules. Follow the district’s settings where they are centrally managed.
Teacher Sandboxes
What is a Teacher Sandbox in Schoology?
A teacher Sandbox is a private Schoology course for planning, practice, and experimentation. Teachers can try course tools, build materials, and enter grades into the gradebook without changing a live class or affecting students.
Why districts should provide a Sandbox Course to every teacher when launching Schoology at their schools
Creating a sandbox for each teacher gives everyone a ready-to-use place to learn Schoology, test settings, and prepare materials before working in student-facing courses. It makes practice available from day one and gives districts a consistent way to support onboarding.
How districts can create Sandboxes in bulk
Schoology’s district-level import tools can provision courses and enroll users from CSV or XLS files. A practical setup is to create one uniquely identified sandbox course and section per teacher, then enroll that teacher as the course admin. The course import requires course and section identifiers; the enrollment import uses those identifiers plus the teacher’s user ID and enrollment type.
Import Courses · Import course enrollments
For ongoing or scheduled provisioning, Schoology supports auto-imports from an SIS through SFTP. Its administrator guide outlines the import sequence—users, courses, then enrollments—and the auto-import setup process. Districts should coordinate the file format and schedule with their Schoology representative.
System administrators: getting started · Set-up auto-import via SFTP
Course Templates
What is a Schoology Course Template?
A course template is a reusable course setup that can include materials and be applied to multiple course sections. Teachers or admins with the right permissions can create one, and system admins can manage templates across the district.
Why districts should create Course Templates for their teachers
District templates help schools start from a consistent course structure and save teachers from rebuilding common materials. Districts can provide shared curriculum, layouts, and resources while still letting teachers tailor their individual courses. Course templates provide a way to standardize course setup and speed up course creation.
District-level setup of Course Templates
- Enable permissions. In admin settings, grant the appropriate roles the course-template permissions they need—such as create, view, and publish or distribute templates. Some permissions have prerequisites. Schoology: Course Template Permissions
- Create the template. Go to Courses → My Courses → Course Templates → Create Course Template. Enter its details, then add the materials and members it needs. An existing section can also be copied as a template.
- Make it available to courses. System admins can publish a template to selected course sections from the template’s Actions menu. For automated distribution, enable the Automated Course Template Distribution permission; templates can then be mapped through the Template Mappings interface, manual imports, or auto-imports. Schoology: Course templates · Schoology: Automated course template distribution
Note: Publishing a template to sections cannot be undone, so review the target sections before confirming.
Parent Portal
What is the Parent Portal in Schoology?
Schoology’s Parent Portal is the parent or guardian view of a student’s Schoology activity. Depending on district settings, parents can see information such as courses, updates, calendars, attendance, assignment submissions, and grades.
Why districts should consider launching the Parent Portal for their parents
Launching Parent Portal accounts across the district gives families a consistent way to follow learning and stay informed. It also lets the district set shared privacy, access, and notification rules, while helping parents connect their accounts to the right students.
Schoology: Manage parent accounts overview
District-level account creation
Schoology documents three district-wide approaches for creating Parent Portal accounts:
- SIS sync: If the district uses a supported, configured SIS, Schoology can create parent accounts and, for most supported systems, associate parents with students from SIS records. Schoology: Create parent accounts using an SIS sync
- CSV/XLS import: Districts with parent data in a file can bulk-create accounts and associations without an SIS sync. Schoology: Manage parent accounts overview
- Parent Access Codes: Enable codes in Tools → School Management → System Settings, then download codes for all students from Tools → User Management → Manage Users → Parents/Advisors → Options → Download All. Distribute the codes so parents can register and link to their child. Schoology: Set up and distribute Parent Access Codes
After account creation, configure parent access and privacy settings to determine which student information parents can view. Schoology: Administer parent account settings
Teachers: Start Here
Use the district’s course structure and conventions as you plan a unit.
Choose a repeatable course structure
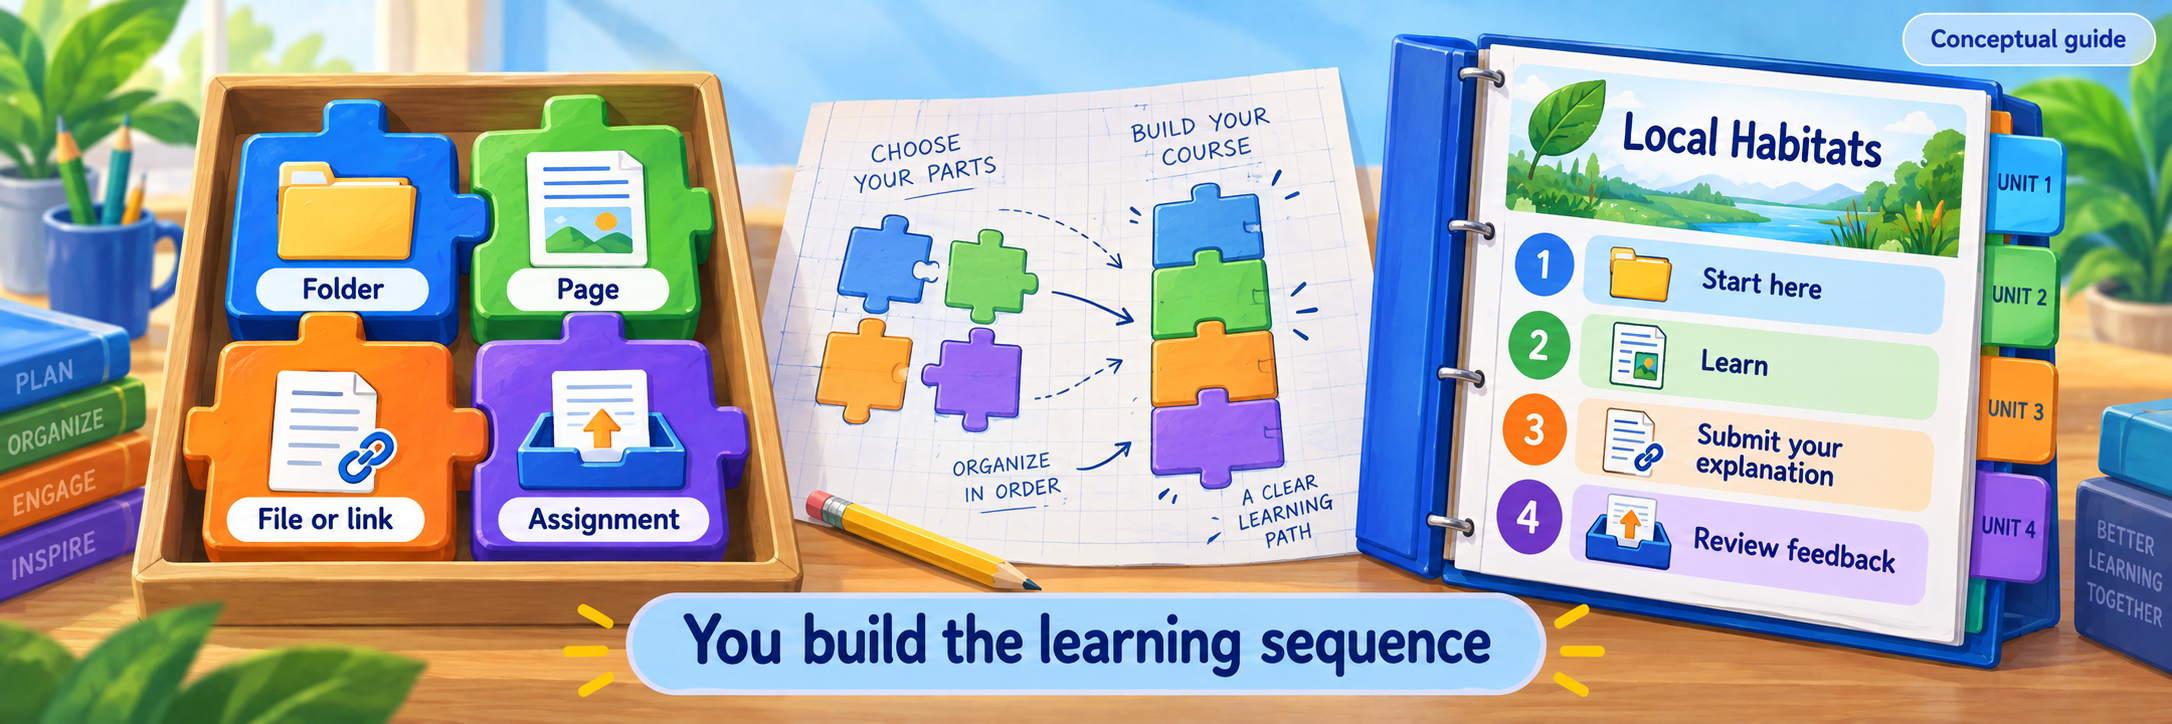
Use a consistent structure by week, unit, or topic. Put a Start Here item near the top with navigation directions, how to ask for help, and what students should do after receiving feedback.
| Component | Instructional purpose |
|---|---|
| Folder | Group a unit or week and arrange its sequence. |
| Page | Explain the lesson using readable text and purposeful media. |
| File or link | Provide a document, source, demonstration, or approved external resource. |
| Assignment | Collect work and connect it to directions, criteria, and feedback. |
| Discussion | Organize a conversation around a prompt and response expectations. |
| Assessment | Build a question-based check of understanding. |
Prepare the course conventions
Agree on clear item titles, a predictable folder order, and a common place for directions. Use numbered titles when the order matters. Avoid deeply nested folders that make students hunt for the current task.
- Keep draft units unpublished until their content and student access have been checked.
- Use meaningful headings, descriptive links, image descriptions, and captions or transcripts for essential media. Keep directions as readable text.
- Use approved content and integrations. Check the sharing settings of externally hosted files as well as Schoology access.
- Explain how students and families should distinguish assignment feedback, current course grades, and the official reporting system.
For folders, use the gear menu’s Edit option to review availability. Scheduled publication and availability dates need to be checked in the actual student context, including time-zone settings.
Teachers: Build a Unit
Build a complete unit from your curriculum, then manage the work and feedback it produces.
Build a small unit around the learning goal
Example: Local Habitats. Students explain how a habitat meets an organism’s needs, using details from a source. Plan the evidence before choosing which files to upload.
| Order and title | What to build |
|---|---|
| 01 Start Here | A PAGE with a brief overview: goal, sequence, expected work, and help route. |
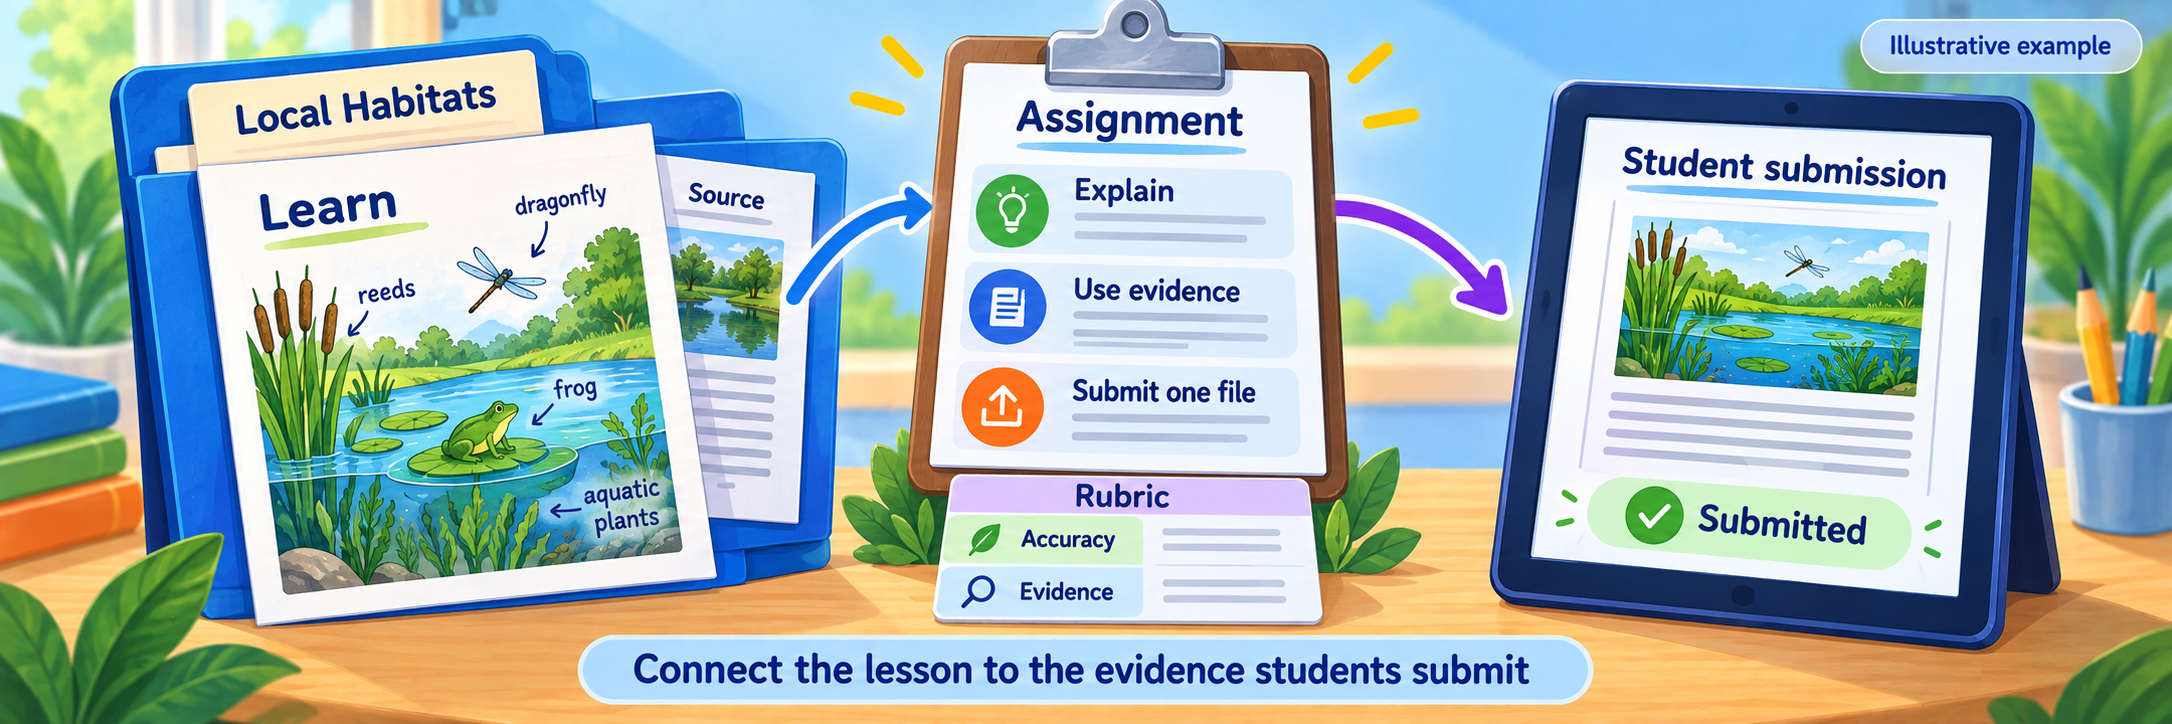
| 02 Learn: A Pond Habitat | A PAGE explaining the concept, with an informative pond image and a short reading or source link. |
| 03 Submit: Habitat Explanation | AN ASSIGNMENT asking for an explanation supported by evidence, with the required format and criteria. |
| 04 Review and Revise | Directions for finding feedback and improving the explanation. Add a brief ASSESSMENT only if it answers a useful teaching question. |
In the course’s Materials area, choose Add Materials → Add FOLDER, name the unit, and create it. Add items inside the folder and arrange them in teaching order.
Write the lesson and attach the sources
- Inside the unit, select Add Materials → Add Page. Add the learning goal, explanation, worked example, and the student’s next step.
- Use the editor’s Insert Content tool for an image or video that helps explain the content. Add an equivalent explanation in text and credit the source. Note: The Insert Content tool can be found in the rich text editor toolbar at the top of the text box for a Schoology Page or Assignment.
- To add a separate document (for example a Word doc or PDF) or website, choose Add Materials → Add File/Link/External Tool, then File or Link. Upload the file or provide the link and a descriptive title.
- Open each item as a learner would. Check readability, playback, file permissions, and whether the linked site should open in a new window.
For the habitat lesson, an annotated pond image can show food, water, and shelter. A decorative student portrait would not explain the concept. Keep the useful content close to the directions that tell students how to use it.
Create an assignment for students to submit in Schoology
Select Add Materials → Add Assignment. Enter the directions, due date, grading category and period, points or scale/rubric, and intended recipients. Enable Submissions when students should turn work in through Schoology. The Ungraded category does not create a gradebook item.
Official guide: assignment fields and options
| Include | Example wording |
|---|---|
| Task | Explain how the pond provides what one organism needs. |
| Evidence | Use two details from the lesson or reading and identify the source. |
| Product | Submit one document containing your explanation. Add a labeled diagram if it helps explain your reasoning. |
| Criteria | Your explanation should be accurate and supported by relevant evidence. |
| Completion | Upload the agreed file format, finish the submission, and confirm it is recorded. |
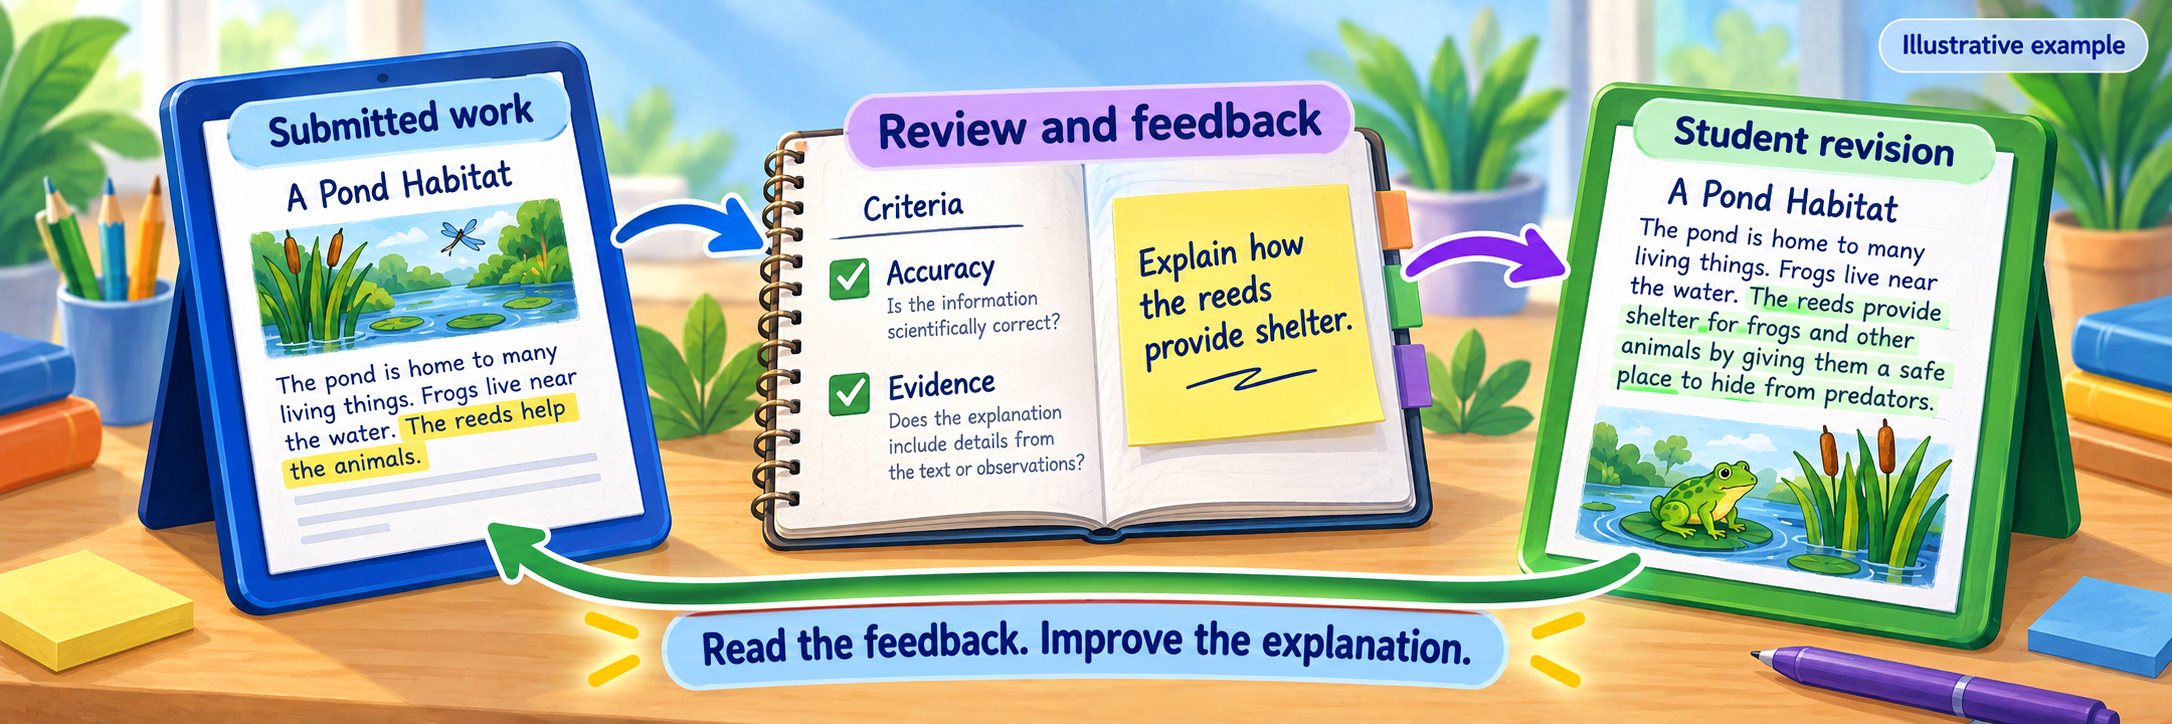
| Revision | Read the feedback, revise the explanation, and resubmit if the assignment allows it. |
If the task uses a Google, Microsoft, or other connected assignment tool, follow the district’s current integration workflow. Test its file-copy, sign-in, and submission behavior separately from a regular file upload.
Add a short assessment when you need one
To set up a Formative or Summative Assessment for students to take in Schoology, choose Add Materials → Add Assessment. Set the title, grading details, and submission availability, then create the item. Use Questions to add items and auto-scoring, and Setup to configure instructions, attempts, timing, available tools, and results visibility.
Official guide: create an assessment
Official guide: add assessment questions
Official guide: assessment settings
Preview the complete assessment, including answer keys and point values. For this unit, one question might ask students to explain how reeds provide shelter; a short answer question like this needs teacher assessment and cannot be auto-graded. Automatically scored items still need a correct key and an instructional review of the results.
Review work, give feedback, and support revision
Open the assignment’s submissions and select a student’s work. Read the response against the stated criteria, then annotate or comment where useful. Enter the score, or select the grade on the rubric, and save the review using the submission controls. Confirm which comments and grades are visible to the student.
Official guide: review and grade submissions
If students don’t achieve proficiency on their first submission, give one actionable next step for resubmission. For example: “Explain how the reeds provide shelter, using a detail from the source.” Demonstrate for students how to reopen the work in Schoology, how to find the feedback, and how to submit a revision when permitted. Identify the latest submission before reviewing the student’s work again.
Use what you learn from students’ initial submissions to reteach a concept, confer with a student, or adjust the next lesson.
Teachers: Before You Launch
Prove that students can reach, complete, and learn from the course you built.
Check visibility, submission access, and grade release
| Decision | What to verify |
|---|---|
| Can students see it? | Check the folder and item publication settings, dates, recipients, and any completion rules. |
| Can students submit? | Check assignment Submissions or assessment submission availability. A visible assessment can still have attempts disabled. |
| Can students see the result? | Review grade publication, comment visibility, and assessment results/answer settings before release. |
Assessment submissions are disabled by default when the assessment is created, even though the assessment itself is published by default. Enable attempts deliberately after reviewing the questions and settings.
Official guide: publication versus assessment submissions
Review Automatically Publish Grades on assignments and the assessment’s results settings. A due date communicates a deadline; also check the actual submission controls.
Walk the route as a learner
- Use Course Options → View Course As to view the course as a student. Treat this feature carefully: you can submit work on a student’s behalf here.
- Use an approved demonstration account or test course for an end-to-end submission test.
- Open the unit, read the Page, load every file or external link, and complete the sample task on the classroom device.
- Return to the teacher view, find the submission, add feedback, and check the intended gradebook entry.
- Return to the student view using View Course As and locate the teacher feedback you entered in the gradebook. Verify the revision resubmission option, if applicable.
Official guide: View Course As and submissions
If you add Student Completion rules, test each requirement and the next item it unlocks. A rule based on viewing a page records access; use actual student work to judge understanding.
Verify grade transfer and prepare for reuse
Where SIS grade passback is enabled, confirm category mapping and grading-period alignment with the district. Follow the configured sync process, inspect the status log, and compare a permitted test item in the receiving gradebook. Queued means processing, and an error needs review; neither confirms a successful transfer.
Official guide: grade passback and sync status
Store reusable lesson materials as templates in Resources and use Add to Course when ready. Imported materials and their resource templates are independent: later edits to one do not update the other. After copying, recheck dates, grading settings, links, integrated tools, and publication.
Official guide: Resources and independent copies
Before the term ends, follow the district’s process for retaining student work and grades and preparing the next course. Confirm access and late-work arrangements with the support contact; course archiving and SIS grading periods affect what remains available.
Resolve common course-building problems
| What you notice | Check first |
|---|---|
| The course or a student is missing | Verify the term, section, enrollment source, and district provisioning status. |
| The teacher sees content but students do not | Check the enclosing folder, item publication, availability dates, individual recipients, and completion rules. |
| A link asks students to request access | Check the source file’s sharing permissions and the account the student is using. |
| A website is blank inside the course | The site may block embedded display. Try its link in a new window and check school filtering. |
| A student sees the task but cannot submit | Check submission settings, attempt availability, and whether the course or task is closed. |
| A graded assignment is missing from the gradebook | Check its category, grading period, and gradebook filters; Ungraded items do not appear. |
| A submitted file cannot be previewed | Try the download or the agreed supported format, then verify the actual file content. |
| A grade is missing in the SIS | Inspect sync status, category mapping, and date alignment before making duplicate entries. |
| An edited template did not change a course | Resources templates and imported course materials are separate copies. |
Good Course-Building Habits
Make the path clear
Use consistent names and a visible starting point in every unit.
Give content a purpose
Connect each file, image, and link to something students should learn or do.
Close the feedback loop
Show students where feedback lives and what to do with it.
Maintain what you build
Review links, dates, permissions, and grading settings each time you reuse a unit.
Official Schoology Resources
Use your district’s Schoology login. These Schoology Guides support course building and instructional management.
2026–27 edition. Official documentation reviewed September 11, 2026. Features and menus depend on district settings and may change. The Local Habitats unit and conceptual illustrations are SDLA examples.