


Clever Quick Start Guide
Give students and staff secure access to approved learning applications without sharing more data than the instructional purpose requires.
Clever can connect district information, application rostering, and single sign-on in one access experience. The exact products, controls, application availability, and interface labels depend on district configuration and agreements.
What Clever Connects
Rostering
Approved SIS data can support user, section, and enrollment updates in connected applications.
Single Sign-On
Supported applications can let authorized users launch from the Clever Portal with their district-managed identity.
Links and Pages
Personalized portals can organize approved applications and digital resources for easier classroom access.
Responsibility check: District administrators approve applications, control data sharing, and manage access. Teachers use and organize only the resources made available through the district’s implementation.
District Administrator Setup
District Clever administrators coordinate the application request, data-sharing scope, technical requirements, and launch.
Request the application or accept an invitation
Request through Clever
- Sign in to the Clever district dashboard.
- Open the area for adding or requesting applications.
- Find the application and review its integration type and requirements.
- Submit the request and identify the intended launch timing.
Accept a provider invitation
- Open the invitation from the application provider.
- Confirm that the provider and application are expected.
- Review the proposed connection before accepting it.
- Continue to data-sharing configuration.
Define the data-sharing scope
Use the application’s available sharing controls to select the narrowest population and fields that meet the approved instructional purpose.
| Approach | What it includes | Good fit |
|---|---|---|
| District-wide | Approved users and records across the district. | Tools intentionally licensed for broad use. |
| Selected schools | Records associated with chosen school sites. | Site licenses and controlled pilots. |
| Rule-based | Users or sections matching defined conditions. | Targeted access by grade, course, school, or program. |
Privacy practice: Share only the users and fields required for the approved educational purpose. Do not default to district-wide access merely because it is easier to configure.
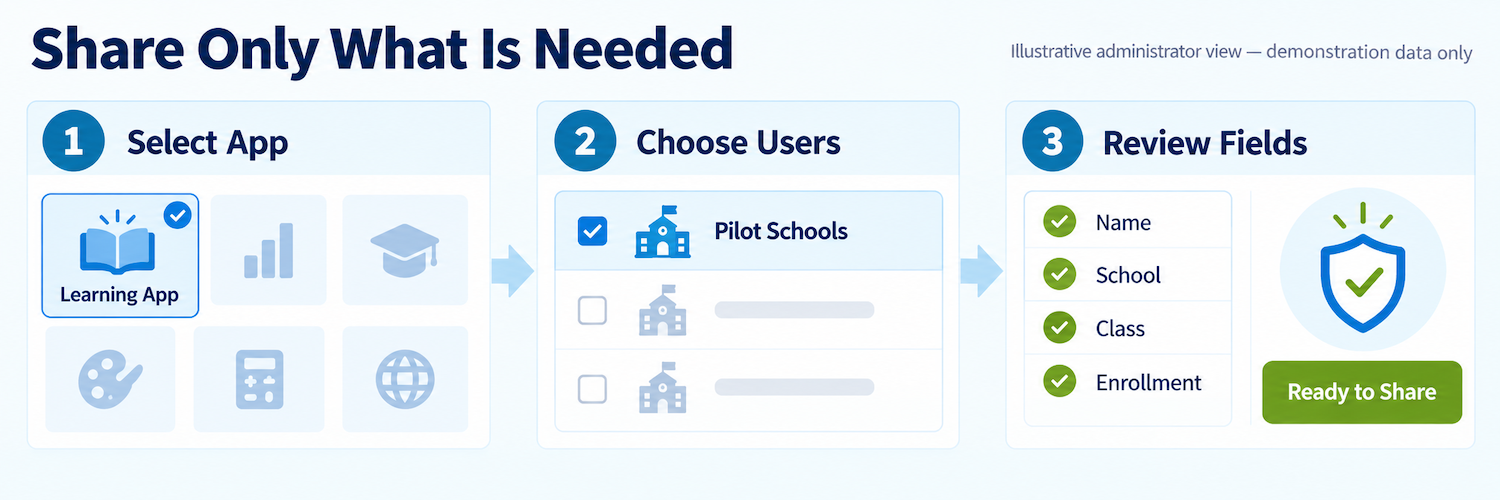
Review fields, synchronization, and launch readiness
- Compare the provider’s required fields with the data available through the district’s Clever sync.
- Confirm that identifiers, schools, users, sections, and enrollments are complete enough for the integration.
- Review optional fields separately; do not enable them without a documented need.
- Coordinate the launch date and initial roster load with the application provider.
- Confirm which users should see the application in their Clever Portal.
Complete any additional authentication or LMS setup
Some applications require additional authentication, provisioning, or LMS configuration. Follow the provider-specific instructions and document the identifiers, URLs, permissions, and maintenance owner.
Teacher Workflow
Teachers work with applications and resources that the district has already approved and shared.
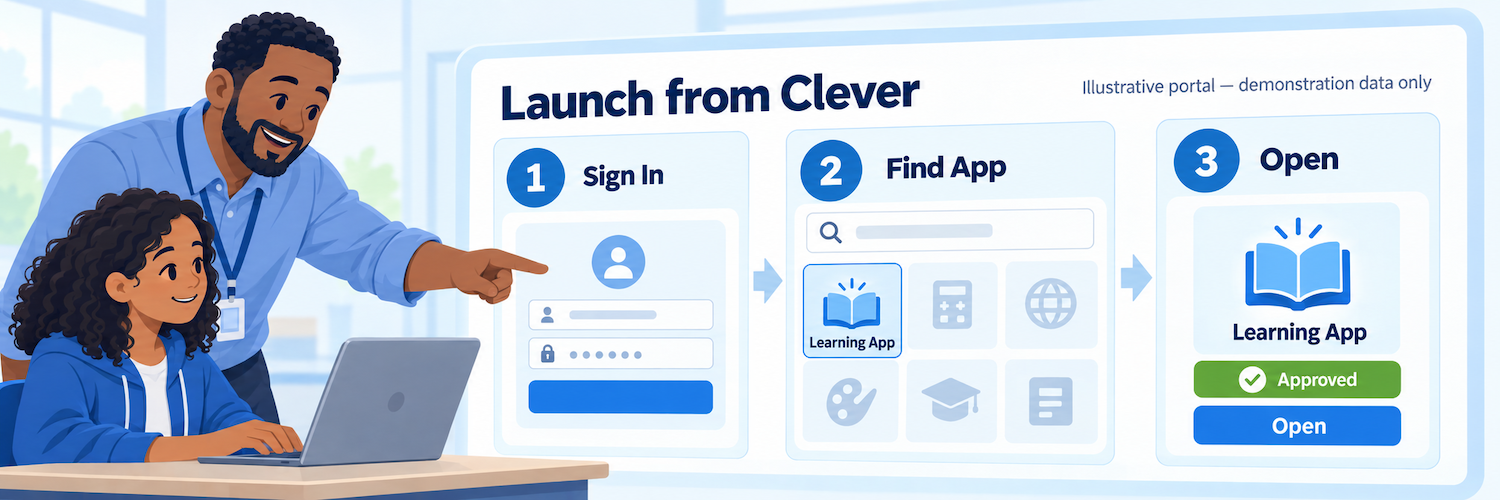
Sign in and find the approved application
- Use the district-approved method to sign in to the Clever Portal.
- Find the application in the location configured by the district.
- Open the application and confirm that it reaches the expected account.
- If it is unavailable, contact the district Clever administrator instead of creating an unapproved workaround.
Confirm the classroom context
- Confirm the correct teacher account, school, class, and term.
- Verify that expected students and sections appear in the connected application.
- Use the application provider’s class or assignment workflow only after the roster is correct.
Organize approved resources
When district configuration permits, organize available applications or approved links so students can identify them easily. A web link is not the same as rostering or SSO and should not be described as an integration.
Organize and test the student experience
- Confirm the intended students can see the application or resource.
- Test the launch with an authorized demonstration account or district-supported test process.
- Verify that the destination application shows the correct identity and class.
- Report missing access, roster, or SSO problems to the district support contact.
Configure, Verify, and Monitor
A connection is not complete merely because the application appears in Clever. Verify the data, access, and end-user experience.
Configuration review
- Sharing rules match the approved user population.
- Required fields are present and optional fields are justified.
- Application visibility matches the rollout plan.
- Authentication settings are complete.
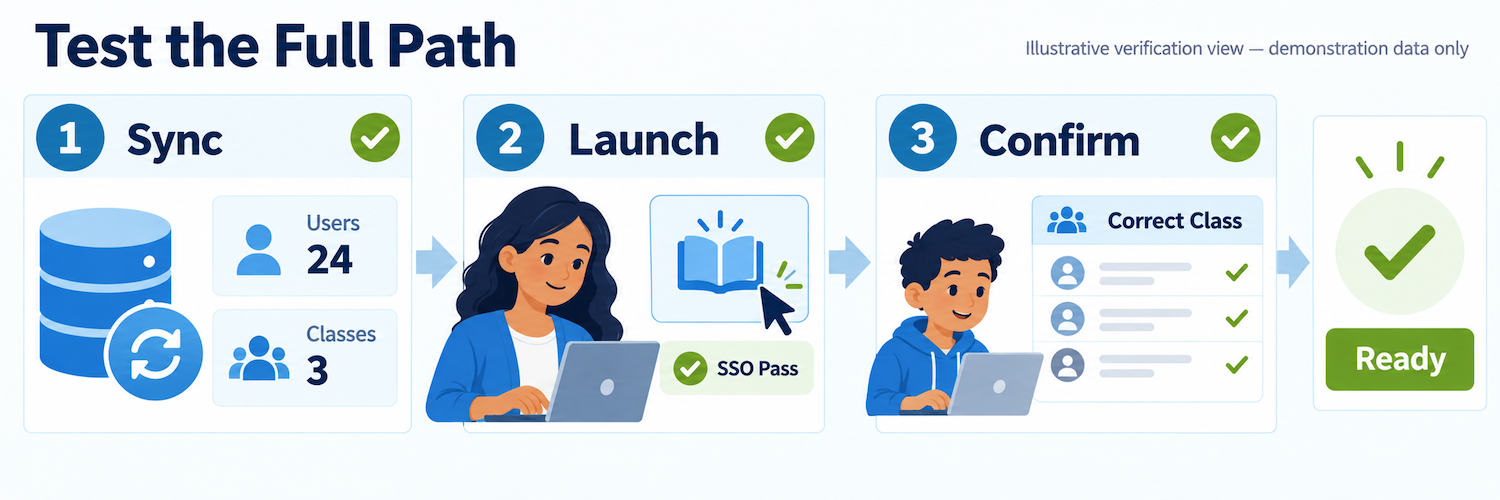
End-to-end verification
- Expected schools, users, sections, and enrollments are included.
- A teacher and student test can launch the application.
- SSO reaches the correct account.
- Classes and memberships appear correctly in the application.
| Symptom | First check | Next action |
|---|---|---|
| Application is not visible | User scope and application visibility | Review sharing rules and portal display settings. |
| Students or classes are missing | SIS sync and rule conditions | Compare affected records with the SIS and shared-data summary. |
| SSO fails | Authentication configuration and user identifier | Review provider-specific SSO settings and test-account attributes. |
| Connection is still pending | Provider acceptance and incomplete setup tasks | Review the application status and contact the provider when necessary. |
| Teacher cannot add the app | Whether the app was shared with that teacher | Have the district administrator review access and availability. |
Monitor after launch: Recheck integrations after major SIS changes, term rollover, school-year setup, sharing-rule changes, or provider configuration updates. Spot-check representative classrooms rather than assuming a successful sync means every user is correct.
Practical Rollout Safeguards
Start small
Pilot with a controlled set of schools, courses, or users. Confirm roster quality and support procedures before expanding access.
Document decisions
Record the application owner, approved purpose, shared fields, access rules, launch date, support contacts, and review schedule.
Official Clever Resources
Use current Clever guidance together with district privacy, security, accessibility, procurement, account-management, and application-support procedures.