
Understanding and implementing the Attendance Tracking and Notification System in PowerSchool
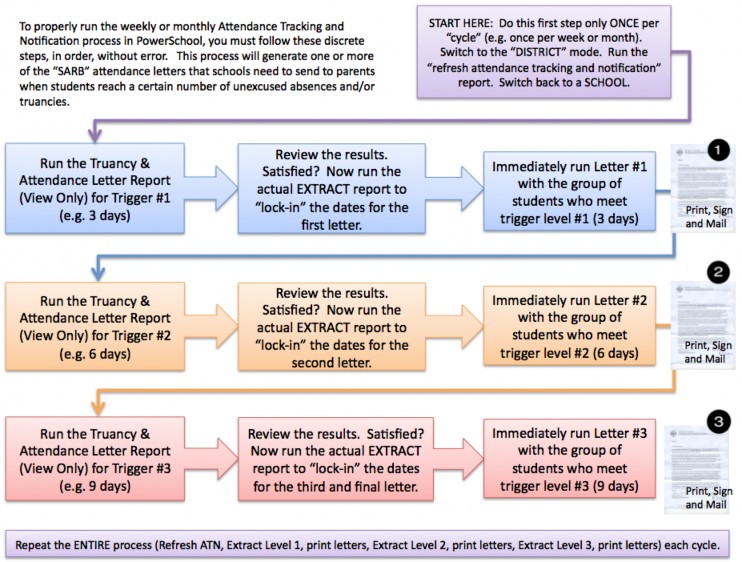
This lesson will demonstrate the steps required to run the attendance tracking and notification system in PowerSchool. This report is typically run on a monthly basis for small schools, and on a weekly basis for larger schools and/or districts. When configured properly, PowerSchool will automatically identify the students at each school who reach certain "trigger levels" of unexcused absences and/or unexcused truancies (defined as a tardy greater than 30 minutes).
Introduction:
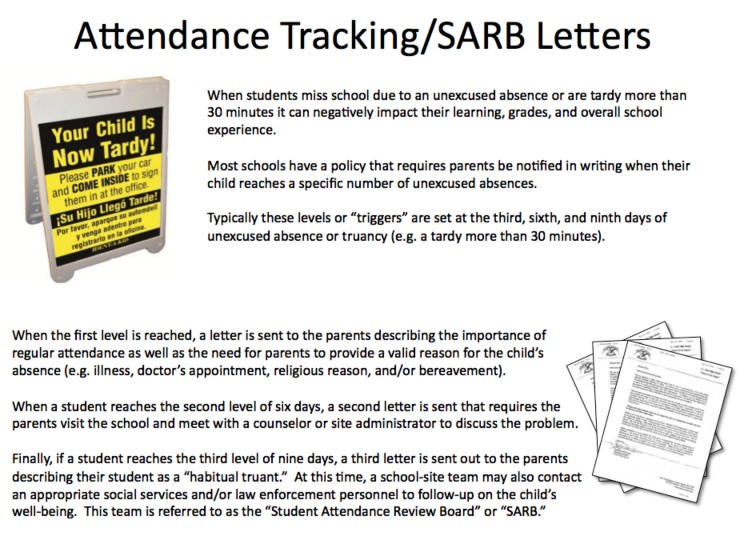
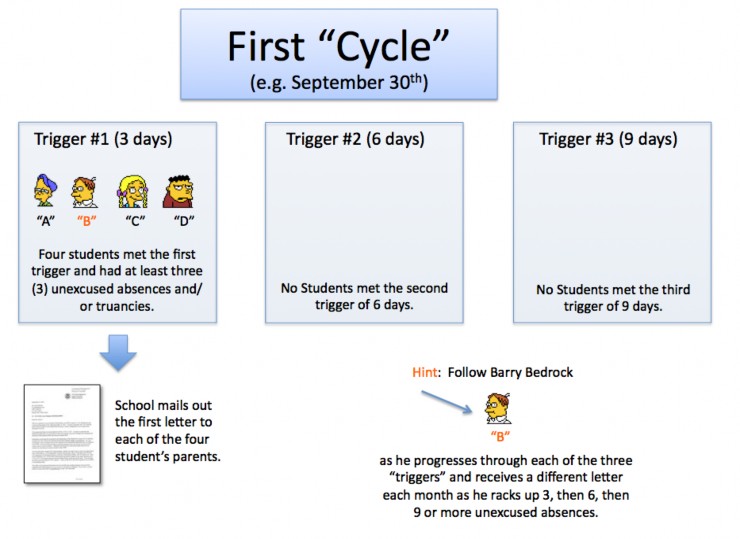
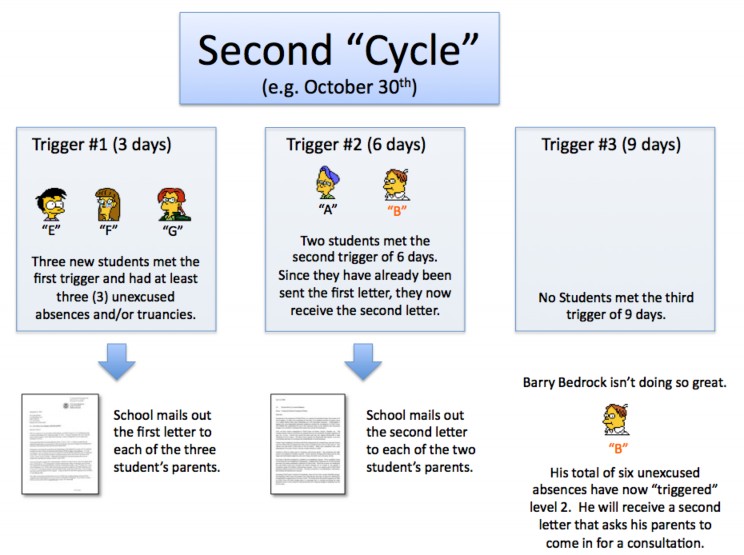
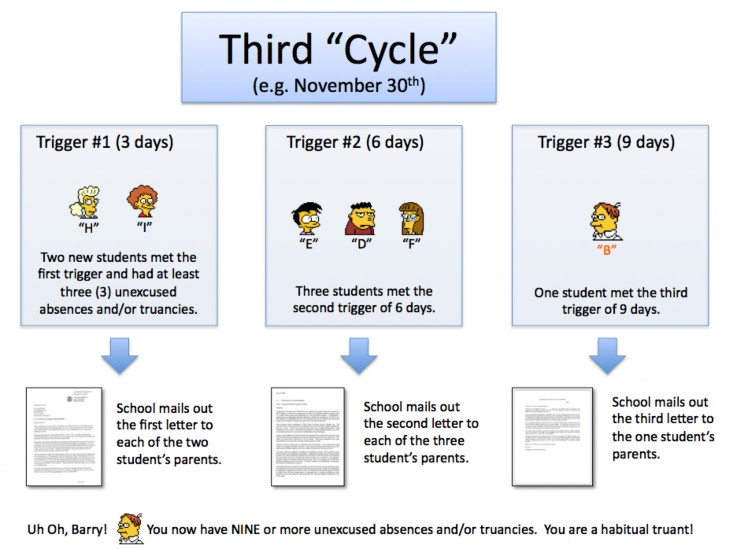
Students in California who have a combination of at least THREE (3) unexcused absences or truancies are sent the first of three different attendance letters. When the same student(s) reach a level of SIX (6) unexcused absences and/or truancies, they receive a second letter. The second letter usually requests the parents visit the school and meet with a counselor, attendance advisor, or administrator to discuss the reasons for the student's absences and to develop a plan to improve attendance. Finally, if the same student(s) reach a combination of NINE (9) unexcused absences and/or truancies, a third letter is sent to the parents notifying them that they are in violation of the state laws that govern student attendance in public schools.
Tardies, which are defined as being late no more than 30 minutes to school/class, as well as EXCUSED absences, are NOT counted towards the "triggers." Thus a student with five tardies and seven excused absences would not reach even the first trigger or "level" and would not be sent the first letter. A student with two unexcused absence and one truancy would reach the first trigger level and receive the first of the three letters.
Powerschool has a built-in Attendance Tracking and Notification system. You can utilize PowerSchool to automatically keep track of students who have reached each level and to remember which students have received each letter so that you do not send out duplicate letters or level 2 or 3 letters before the student has reached those levels.
The following is an explanation of the overall process, as well as a step-by-step guide.
Overview of the ATN process in PowerSchool
Step 1 - Sign into PowerSchool's admin portal.
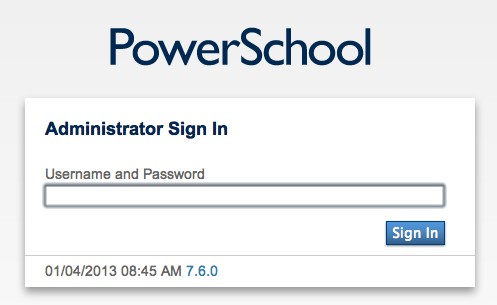
Note: Enter your username, then a semicolon, then your password like this: username;password
Step 2 - Select the District Office (You must have adequate security privileges)
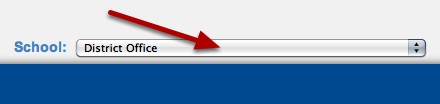
From the District Office you will run a process to "refresh" the list of students who have met each trigger level, if any. You should run this process only once each "cycle" (e.g. only once per week or month).
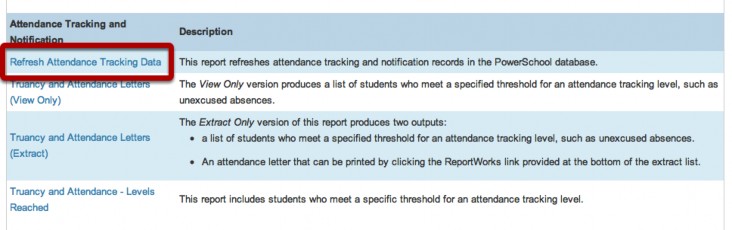
Step 3 - From the District Office, run the "Refresh Attendance Tracking Data" process once (and only ONCE!)
If you try to run this from a school site, you will receive an error message. So make sure you are in the DISTRICT OFFICE, run the process once, then switch back to your school The ATN process must be run separately for each school. If multiple individuals at different school sites will be running a weekly or monthly ATN process, they must coordinate with at least one district staff member to make sure the "refresh attendance tracking data" is run once and only once per "cycle." Otherwise students who should receive a letter will be missed if the refresh process is run once and then again before each school has had a chance to run through the process at each school site.
Step 4 - Run the Refresh Attendance Tracking Data Report
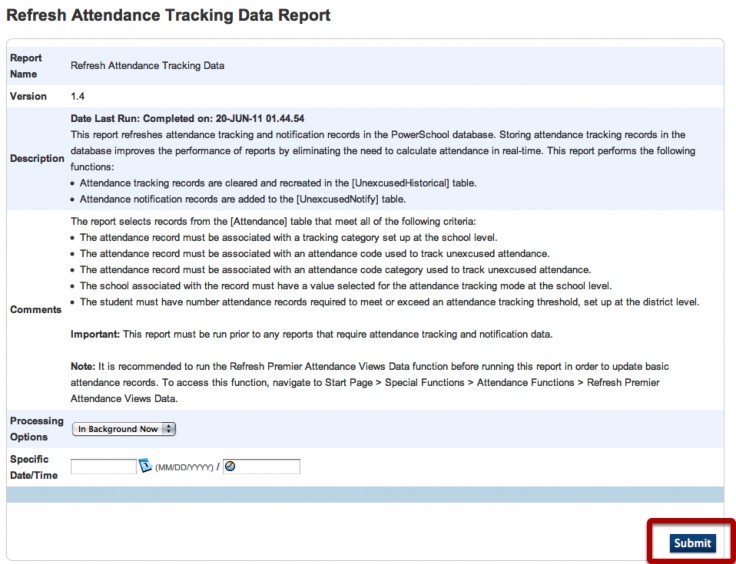
All you need to do on this page is click the "submit" button and let the refresh process run its course.
Step 5 - Leave the DiSTRICT OFFICE and return to the SCHOOL that you want to run the ATN process.
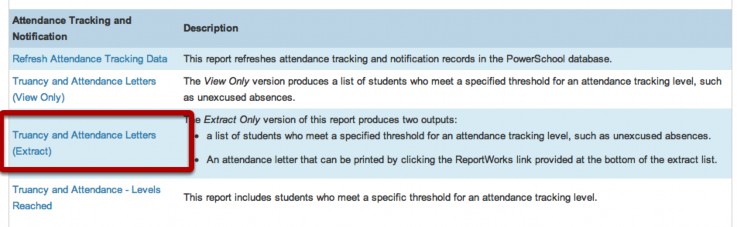
Step 6 - From the SYSTEM REPORTS page, select and run the "TRUANCY AND ATTENDANCE LETTERS (VIEW ONLY)" report.
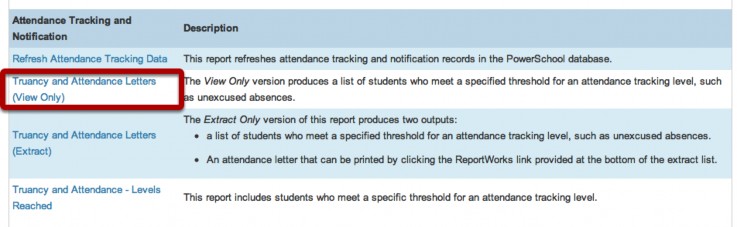
Don't try and run this from the DISTRICT MODE. Remember, you must be back at a school site in order to run this report.
Step 7 - Select the Extraction Type and Trigger Level
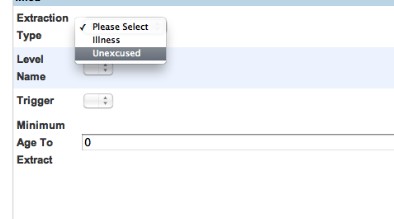
In this first pass, we will select "Unexcused" as an Extraction Type, "Unexcused" as a Level Name, and number "1" as a trigger level. Note - we will repeat this process three times, first for trigger level 1, then for trigger level 2, and finally for trigger level 3.
Step 8 - View the list of students (if any), that meet the parameters you've set (e.g. Unexcused absences at Trigger #1)
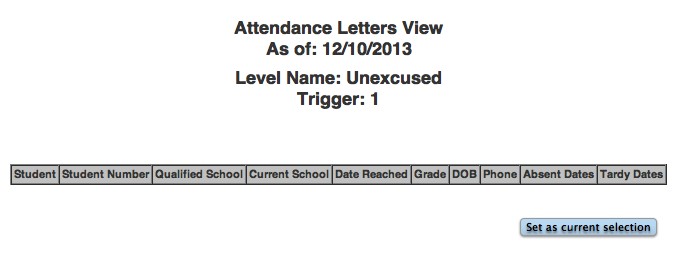
In this particular case, no students met the first trigger level (which is any combination of at least 3 unexcused absences or truancies).
In another example, this school has 14 students who have met Level 1.
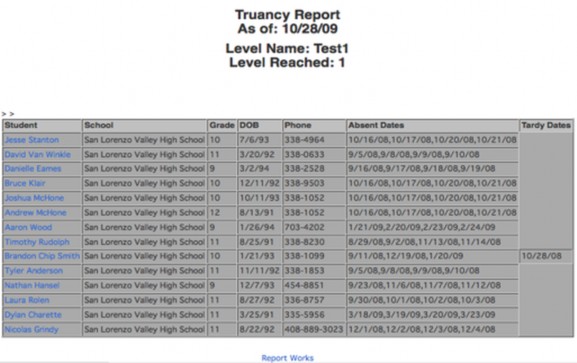
After reviewing the students and their absent dates, you can verify that the list of students who should receive the first letter is accurate. You can then go on to the next - AND VERY IMPORTANT - step of actually "extracting" the date information.
Step 9 - Run the Truancy and Attendance Letters (EXTRACT) report
Step 10 - Read the Confirmation Dialogue box and click "OK" to continue.
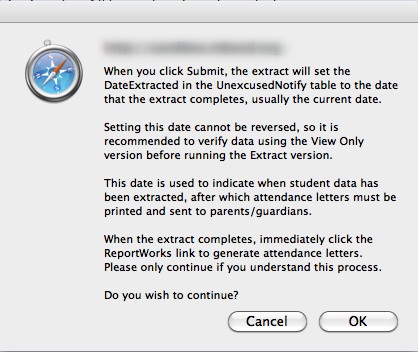
By clicking "OK" you will now "stamp" the list of students who have met Trigger Level 1. The next time you run the ATN process these students will not show up as needing letter #1 since it is assumed now that you will be printing out the first letter.
Step 11 - Click on the "REPORTWORKS" button
This will send you to the ReportWorks page. On this page you will need to select the appropriately labelled "SARB Letter #1" Report (Note: the actual name will vary from district to district).
Step 12 - Run the selected ReportWorks report and the save and print the resulting PDF file.
Don't forget to mail out or send home the letters to the parents.
Step 13 - We're not done yet! We now need to repeat this process for any students who might have reached the SECOND trigger level
Follow the same steps 6-12 above, but this time change the trigger level to "2". This should pull any student(s) who have at least 6 days of unexcused absences and/or truancies. In addition, select the SECOND Truancy letter from the list of Truancy/SARB letters in the ReportWorks page. Review the second letters as they may require a school site administrator to assign a date/time for an on-site parent conference to discuss the student's absences and to develop a plan to remediate the problem.
Step 14 - We're STILL not done yet! We now need to repeat the process for students who may have reached the THIRD trigger.
Follow the same steps 6-12 above, but this time change the trigger level to "3". This should pull any student(s) who have at least 6 days of unexcused absences and/or truancies. In addition, select the THIRD Truancy letter from the list of Truancy/SARB letters in the ReportWorks page. Mail out the third batch of letters. Contact any necessary social services or law enforcement agencies as necessary to protect the welfare of the student.
Step 15 - Wait untl the next "cycle" (usually a week or a month, depending upon the absentee rates of your school), then run the entire process again!